Screen Capture
CutReady includes a built-in screen capture system for taking reference screenshots during demo planning. It supports multi-monitor setups and region-based selection.

How It Works
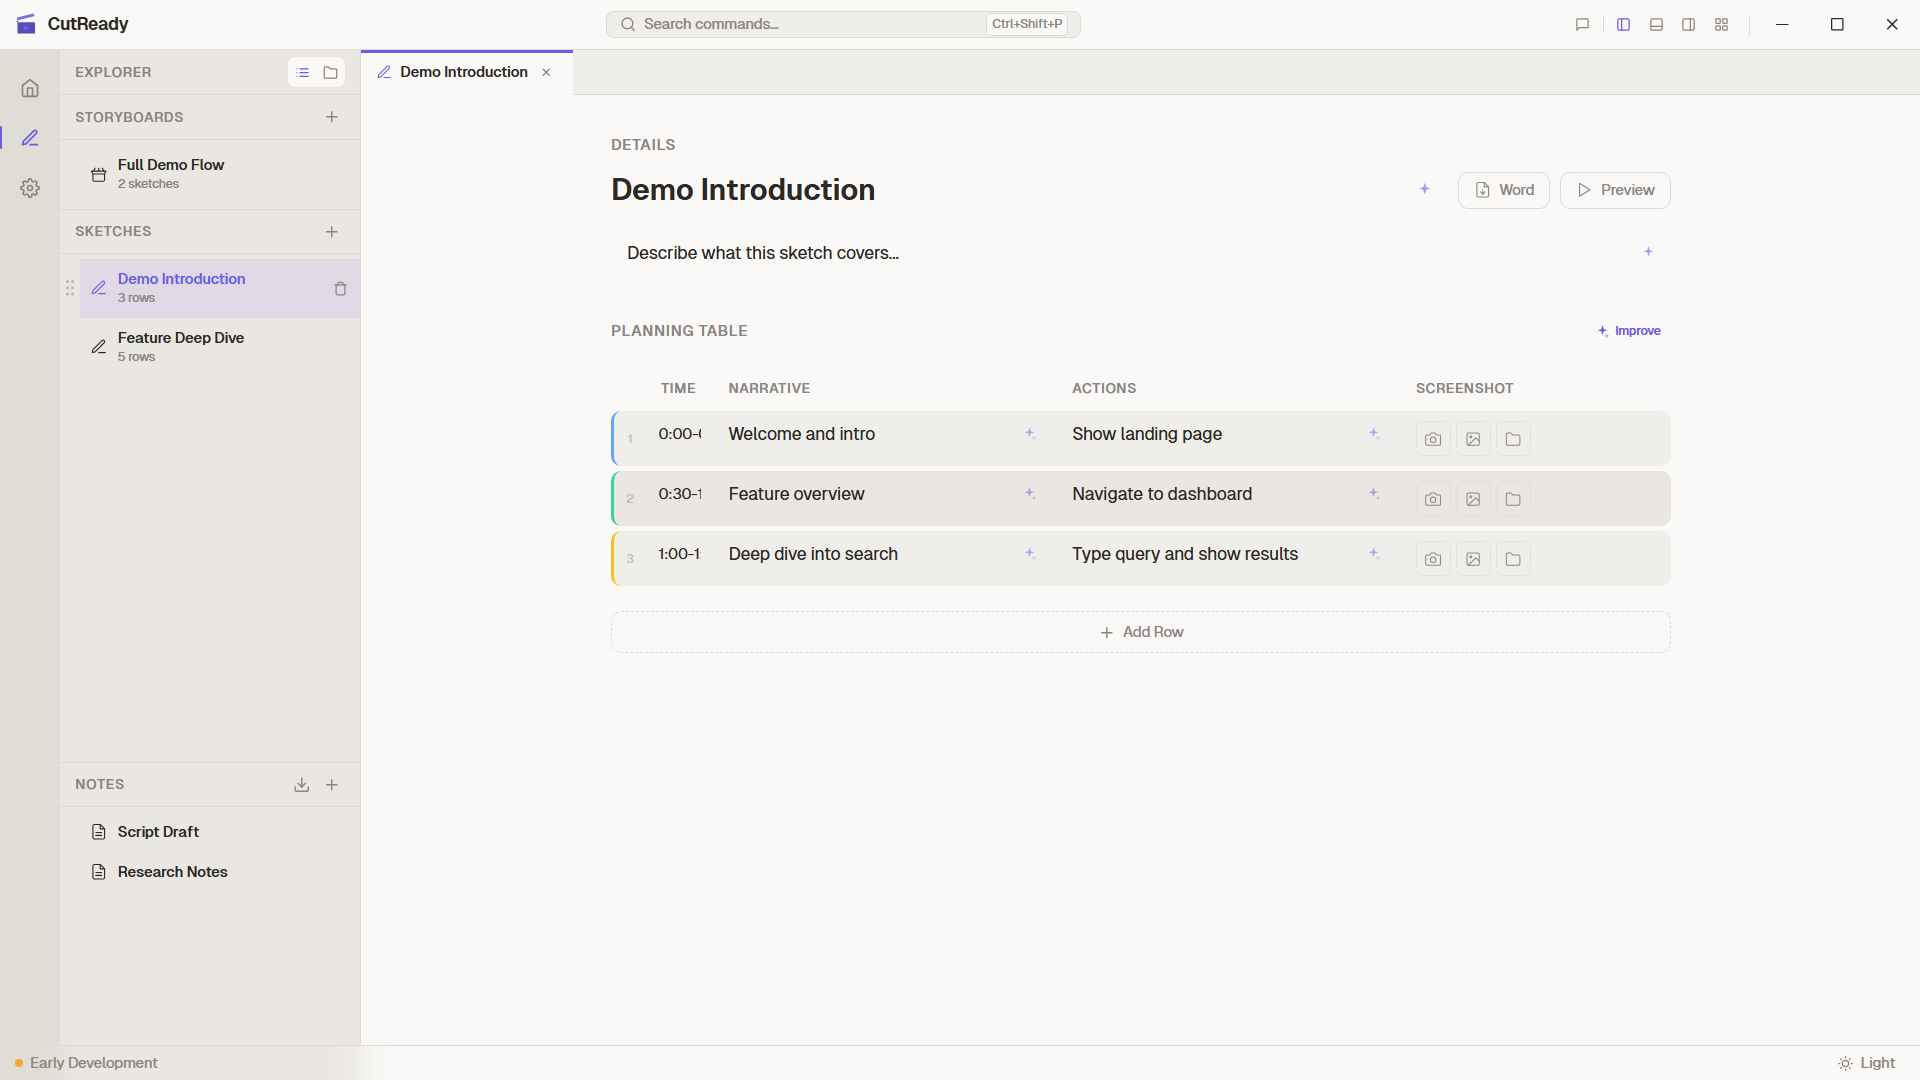
Section titled “How It Works”When you click the capture button (📸) in a sketch row’s screenshot cell:
- Monitor Selection — A picker appears showing all connected displays
- Capture Mode — Choose between full-screen or region capture
- Region Selection — Draw a rectangle on the screen to capture a specific area
- Preview — The captured image is immediately shown in the sketch table
Multi-Monitor Support
Section titled “Multi-Monitor Support”CutReady detects all connected monitors and presents them as selectable thumbnails. This is especially useful for demos that span multiple screens or when you need to capture from a specific display.
Region Selection
Section titled “Region Selection”The region selector uses a dedicated capture window — a transparent, borderless overlay that covers the selected monitor. Draw a rectangle to select exactly the area you want to capture.
Features:
- Crosshair cursor for precise selection
- Coordinates overlay showing the selected region
- Escape to cancel the capture
- Captured image is automatically cropped to the selection
Lightbox Preview
Section titled “Lightbox Preview”Click any screenshot thumbnail in the planning table to open a lightbox view — a full-size overlay with:
- Zoomed view of the captured image
- Click outside or press Escape to close
Storage
Section titled “Storage”Screenshots are stored as part of the sketch document within the project folder. They are version-controlled alongside the sketch content, so previous versions of screenshots are always recoverable.