Settings
The Settings panel lets you configure CutReady’s output behavior, AI provider connection, and custom agent definitions. Open it from the gear icon (⚙️) in the sidebar.
Settings Tabs
Section titled “Settings Tabs”Settings are organized into tabs:
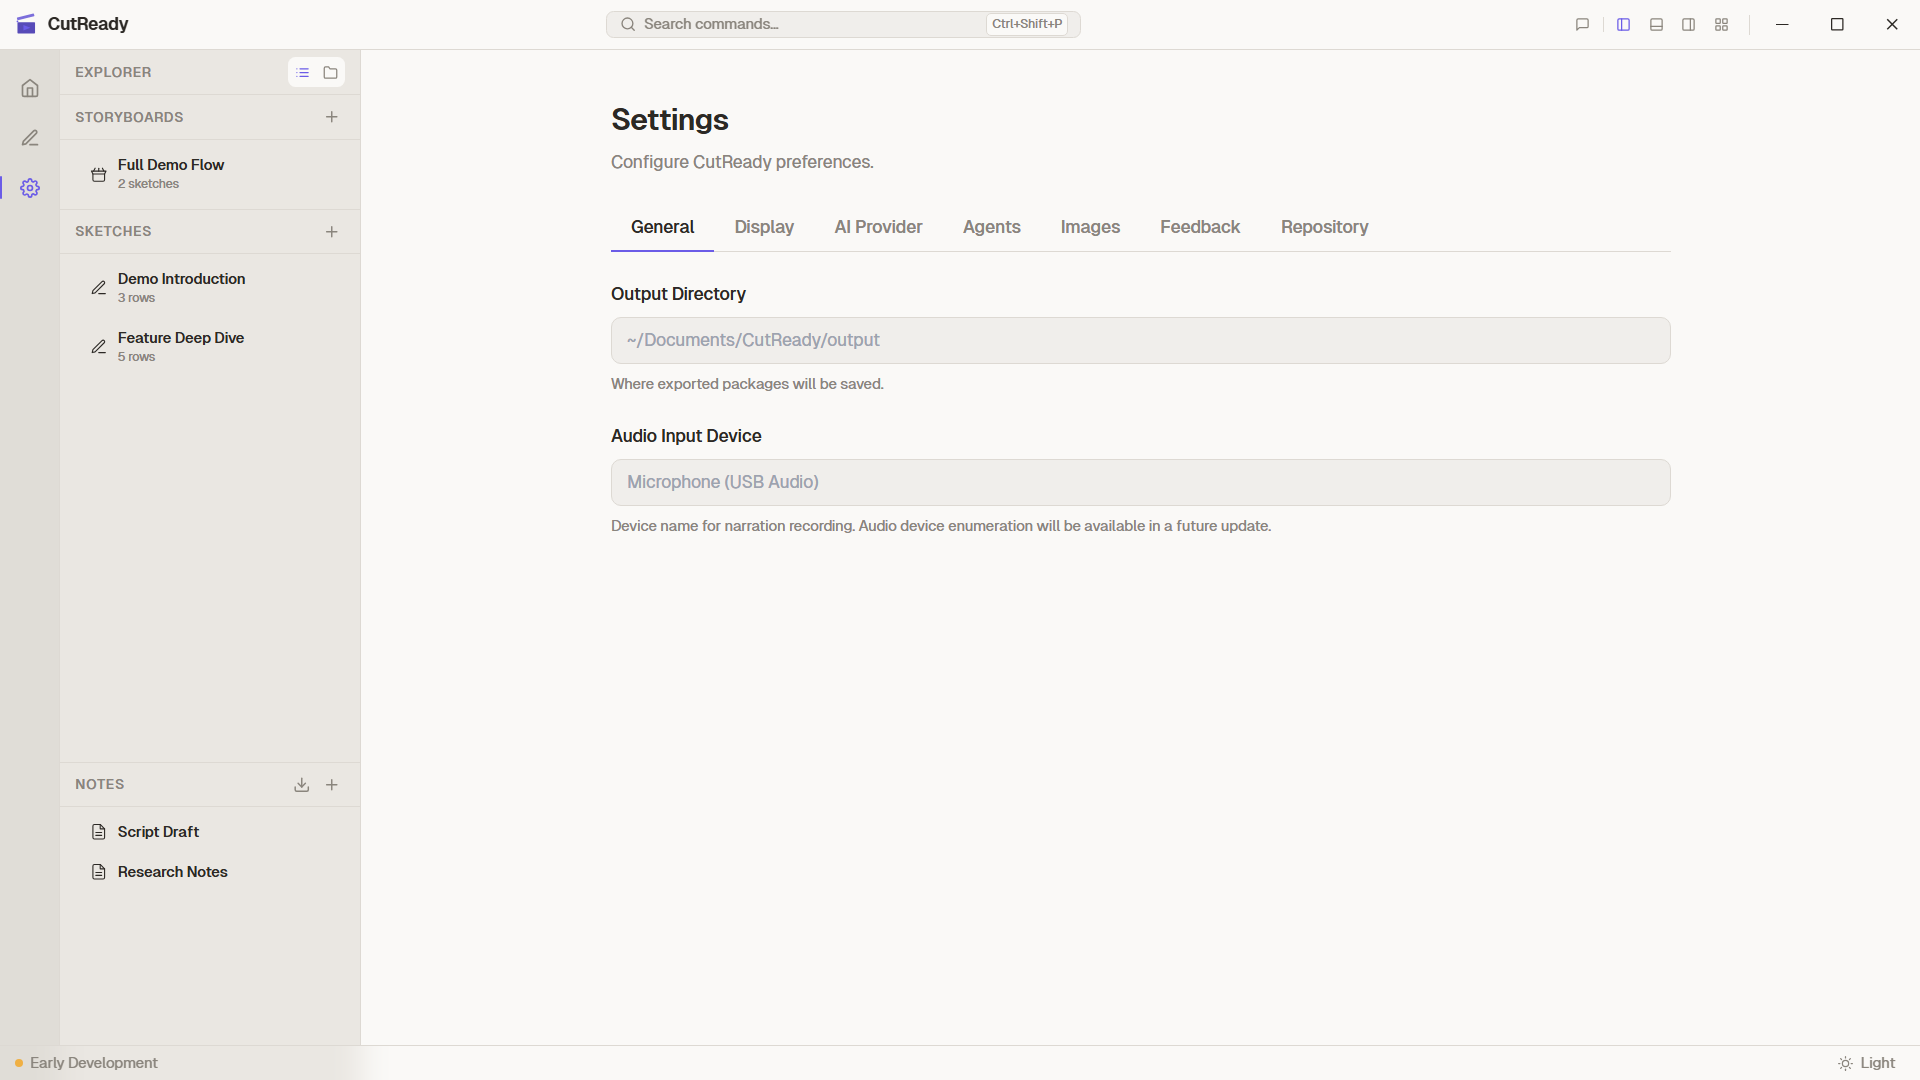
Output Directory
Section titled “Output Directory”
Choose where CutReady saves exported video files and assembled output folders. Click Browse to select a directory, or type a path directly.
Audio Input Device
Section titled “Audio Input Device”Select the microphone used for narration recording during the Produce phase. CutReady lists all available audio input devices detected on your system. The selected device is saved and reused across sessions.
Provider Selector
Section titled “Provider Selector”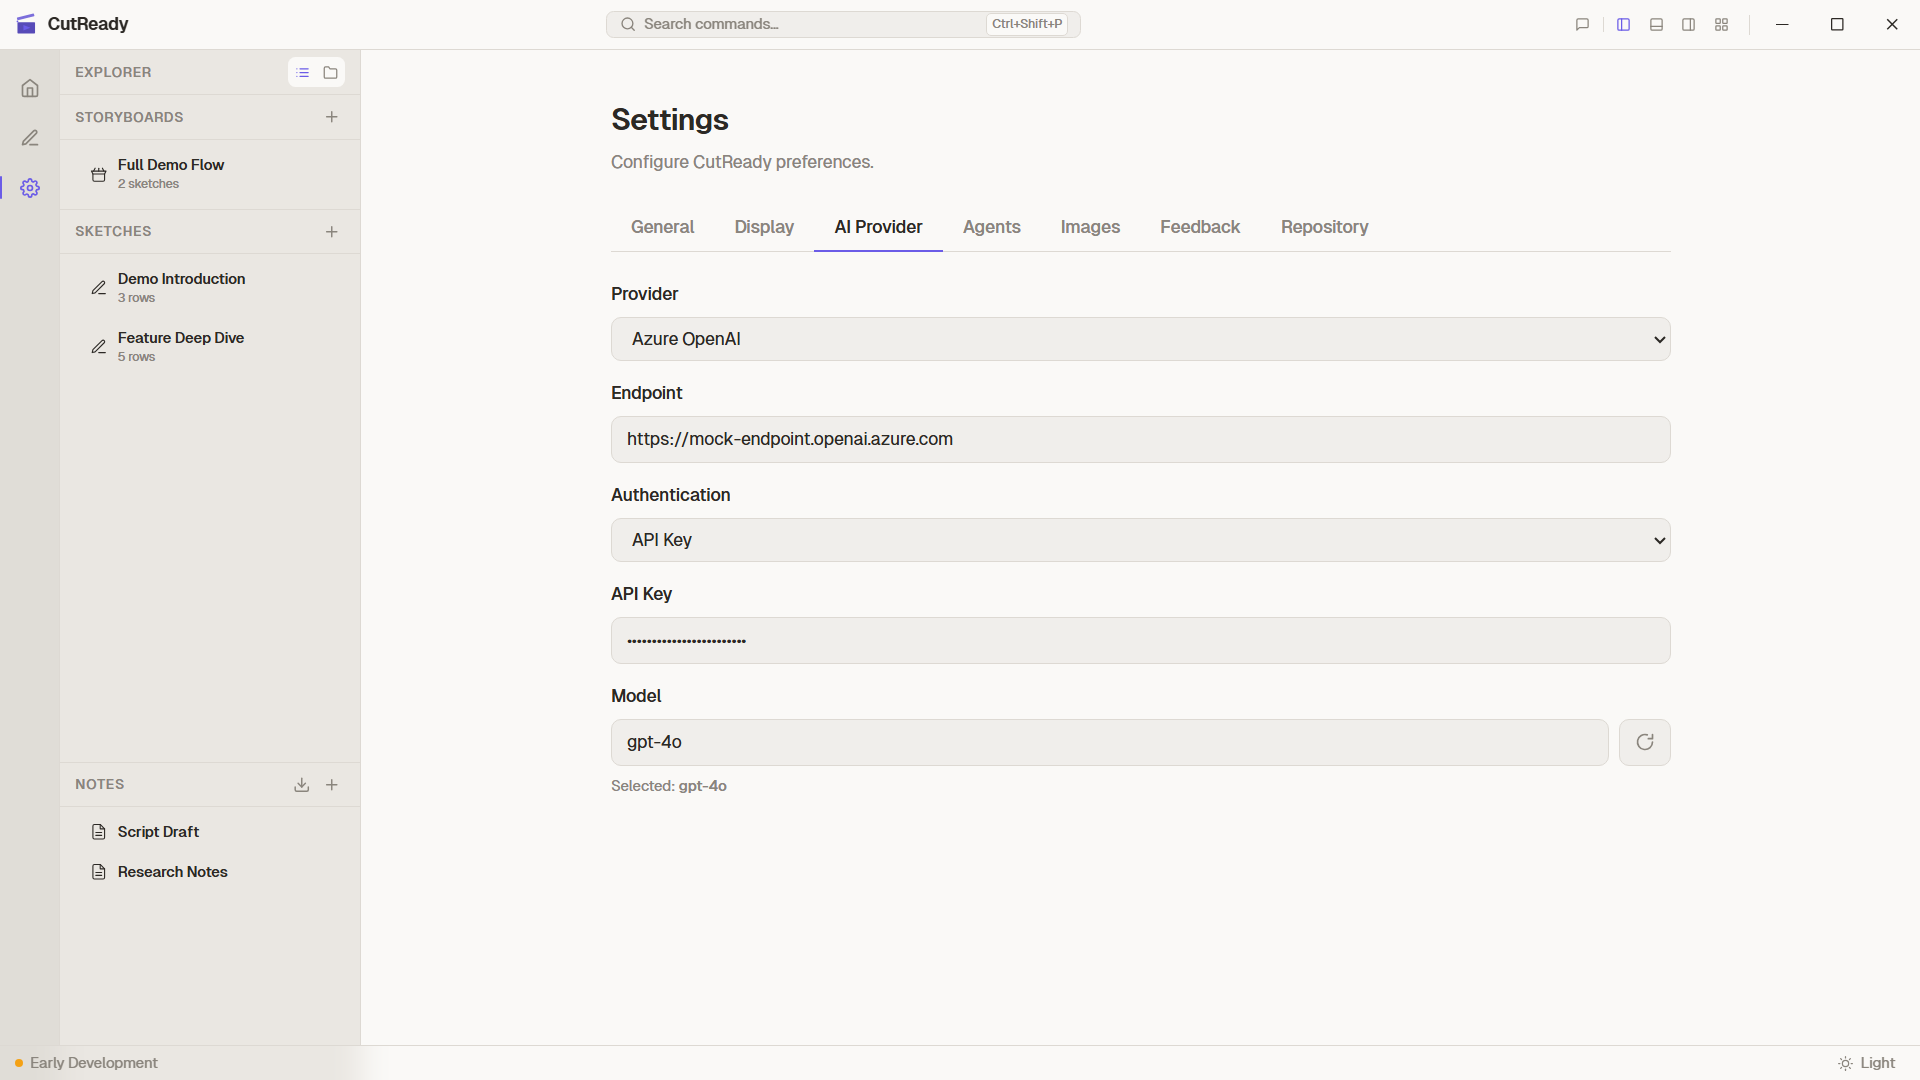
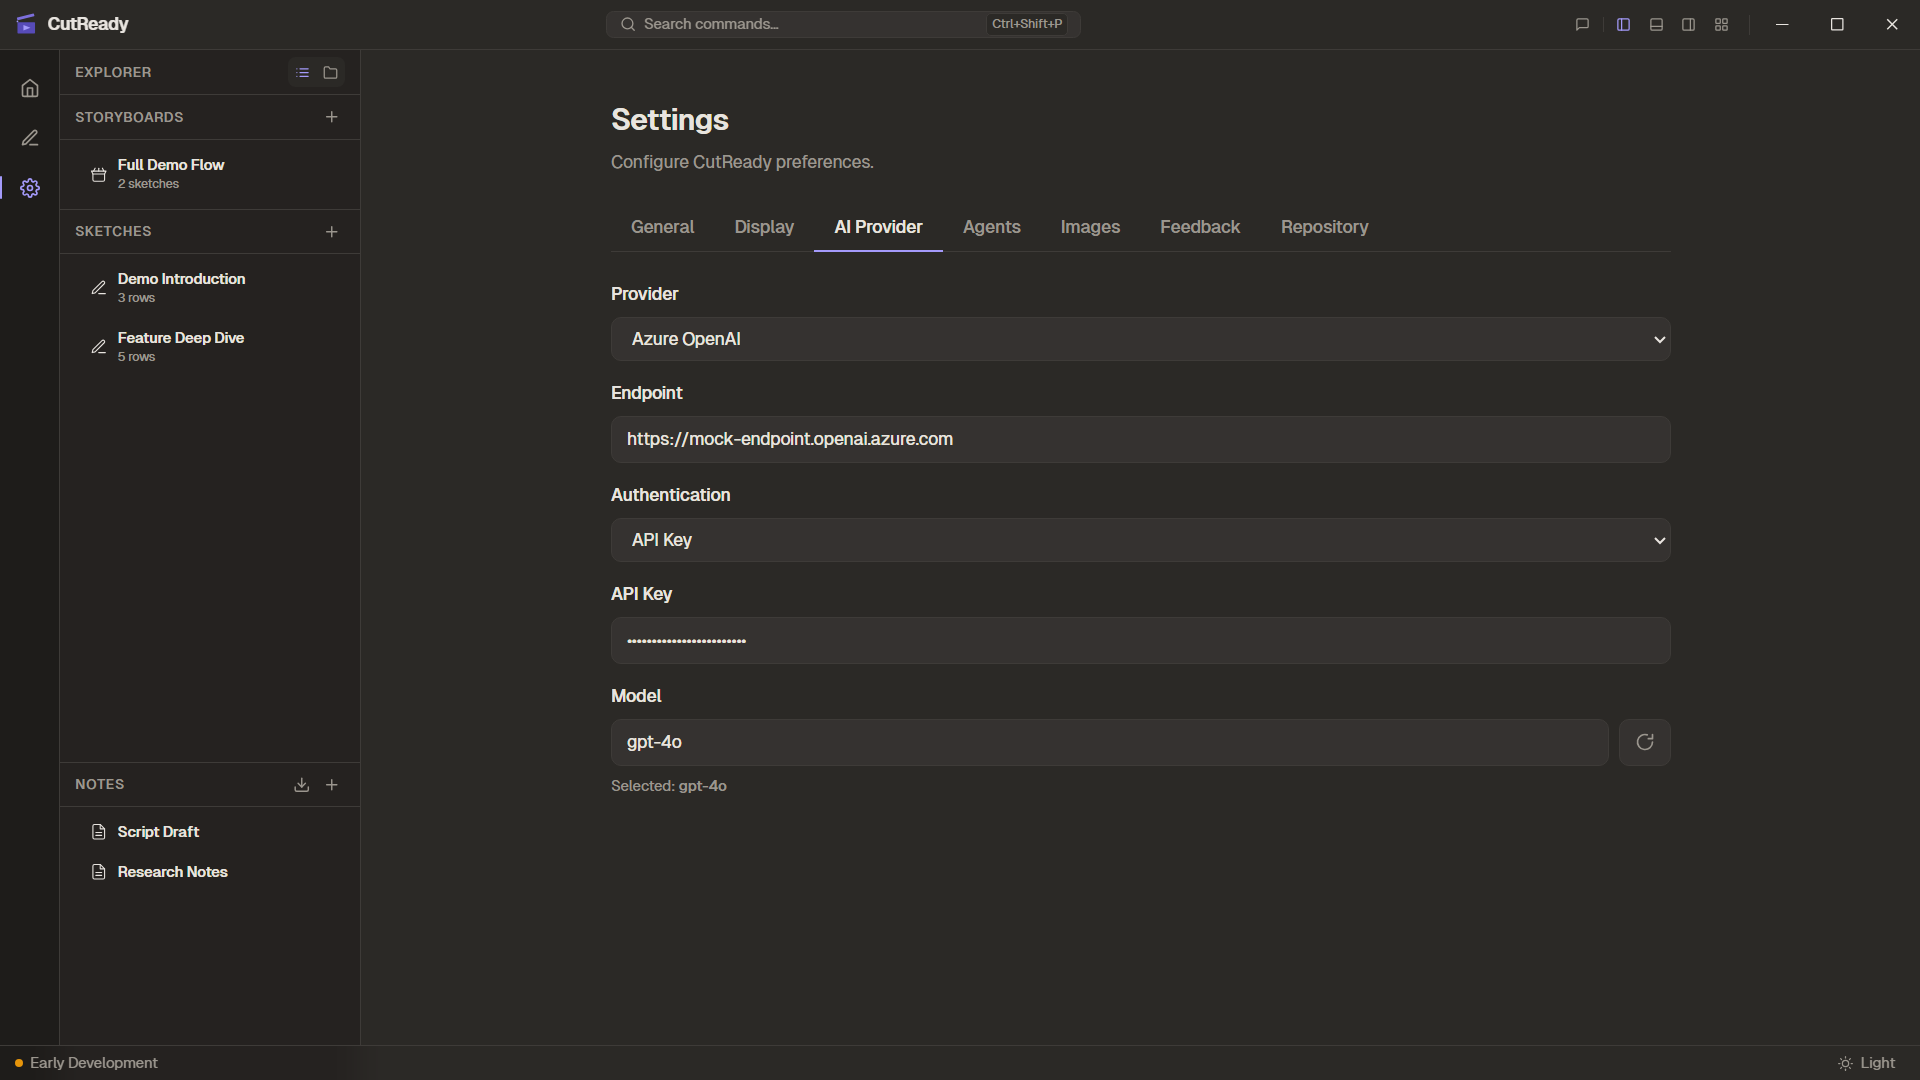
Choose between supported LLM providers:
| Provider | Auth Method | Configuration |
|---|---|---|
| Azure OpenAI | OAuth or API key | Endpoint, Tenant ID, Client ID, model |
| OpenAI | API key | API key, model |
Azure OpenAI Setup
Section titled “Azure OpenAI Setup”For Azure OpenAI, configure the following:
- API Endpoint — Your Azure OpenAI resource URL (e.g.,
https://your-resource.openai.azure.com/) - Authentication — Choose between:
- OAuth — Click “Sign in with Azure” to start the Azure AD flow. Requires Tenant ID and Client ID.
- API Key — Paste your Azure OpenAI API key directly
- Tenant ID — Your Azure AD tenant identifier (for OAuth)
- Client ID — Your Azure AD application client ID (for OAuth)
- Model — The deployed model name (e.g.,
gpt-4o,gpt-4o-mini)
OpenAI Setup
Section titled “OpenAI Setup”For direct OpenAI access:
- API Key — Your OpenAI API key
- Model — The model to use (e.g.,
gpt-4o,gpt-4o-mini)
Built-in Agents
Section titled “Built-in Agents”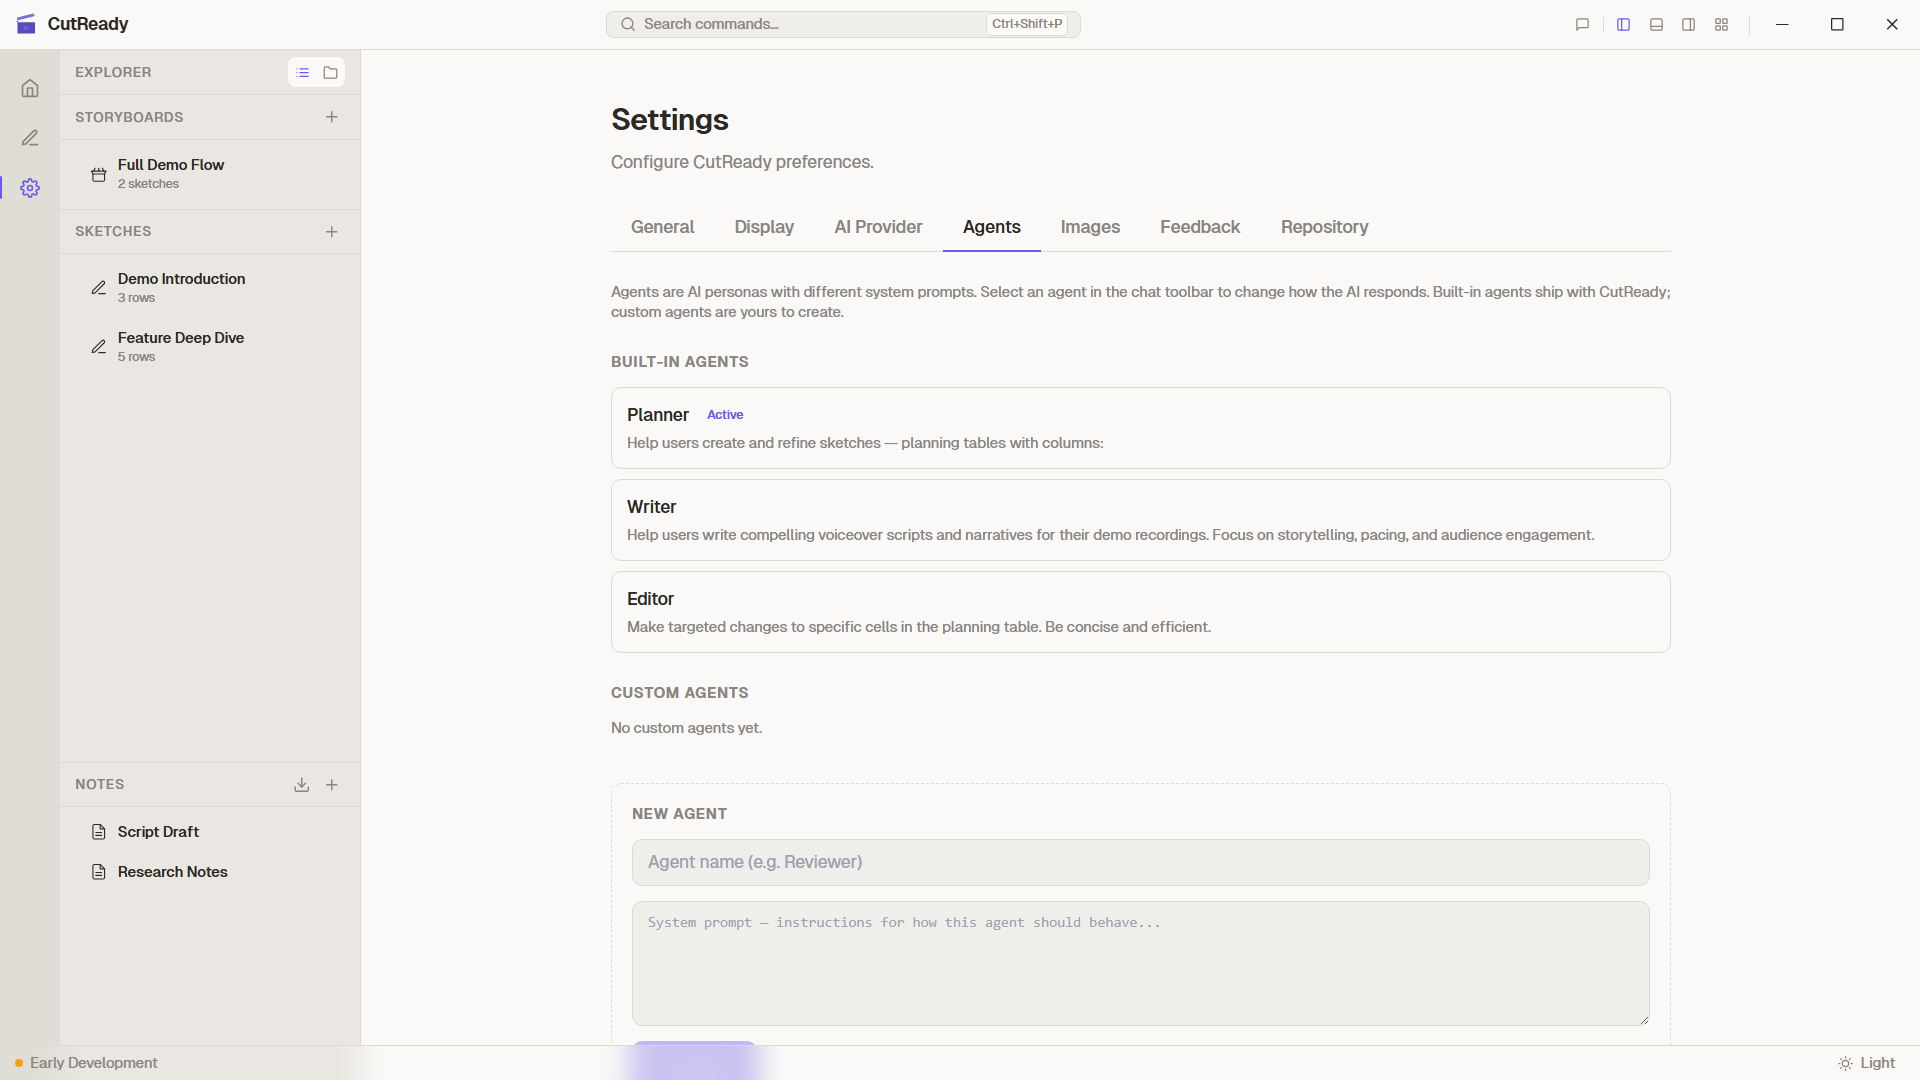
CutReady ships with three built-in agents that are read-only — you can view their system prompts but not modify them:
| Agent | Purpose |
|---|---|
| Planner | Demo planning, structure, and flow |
| Writer | Narrative refinement and voiceover text |
| Editor | Precise, surgical edits to specific content |
Custom Agents
Section titled “Custom Agents”Create your own agents with custom system prompts for specialized tasks:
- Add — Click “Add Agent” and provide a name and system prompt
- Edit — Click any custom agent to modify its name or prompt
- Delete — Remove custom agents you no longer need
Custom agents appear alongside built-in agents in the chat panel’s agent selector. They use the same model and tools as built-in agents.
Example Use Cases
Section titled “Example Use Cases”- Brand Voice — An agent that writes in your company’s style guidelines
- Technical Writer — An agent focused on precision and technical accuracy
- Concise Editor — An agent that ruthlessly cuts unnecessary words
Feedback History
Section titled “Feedback History”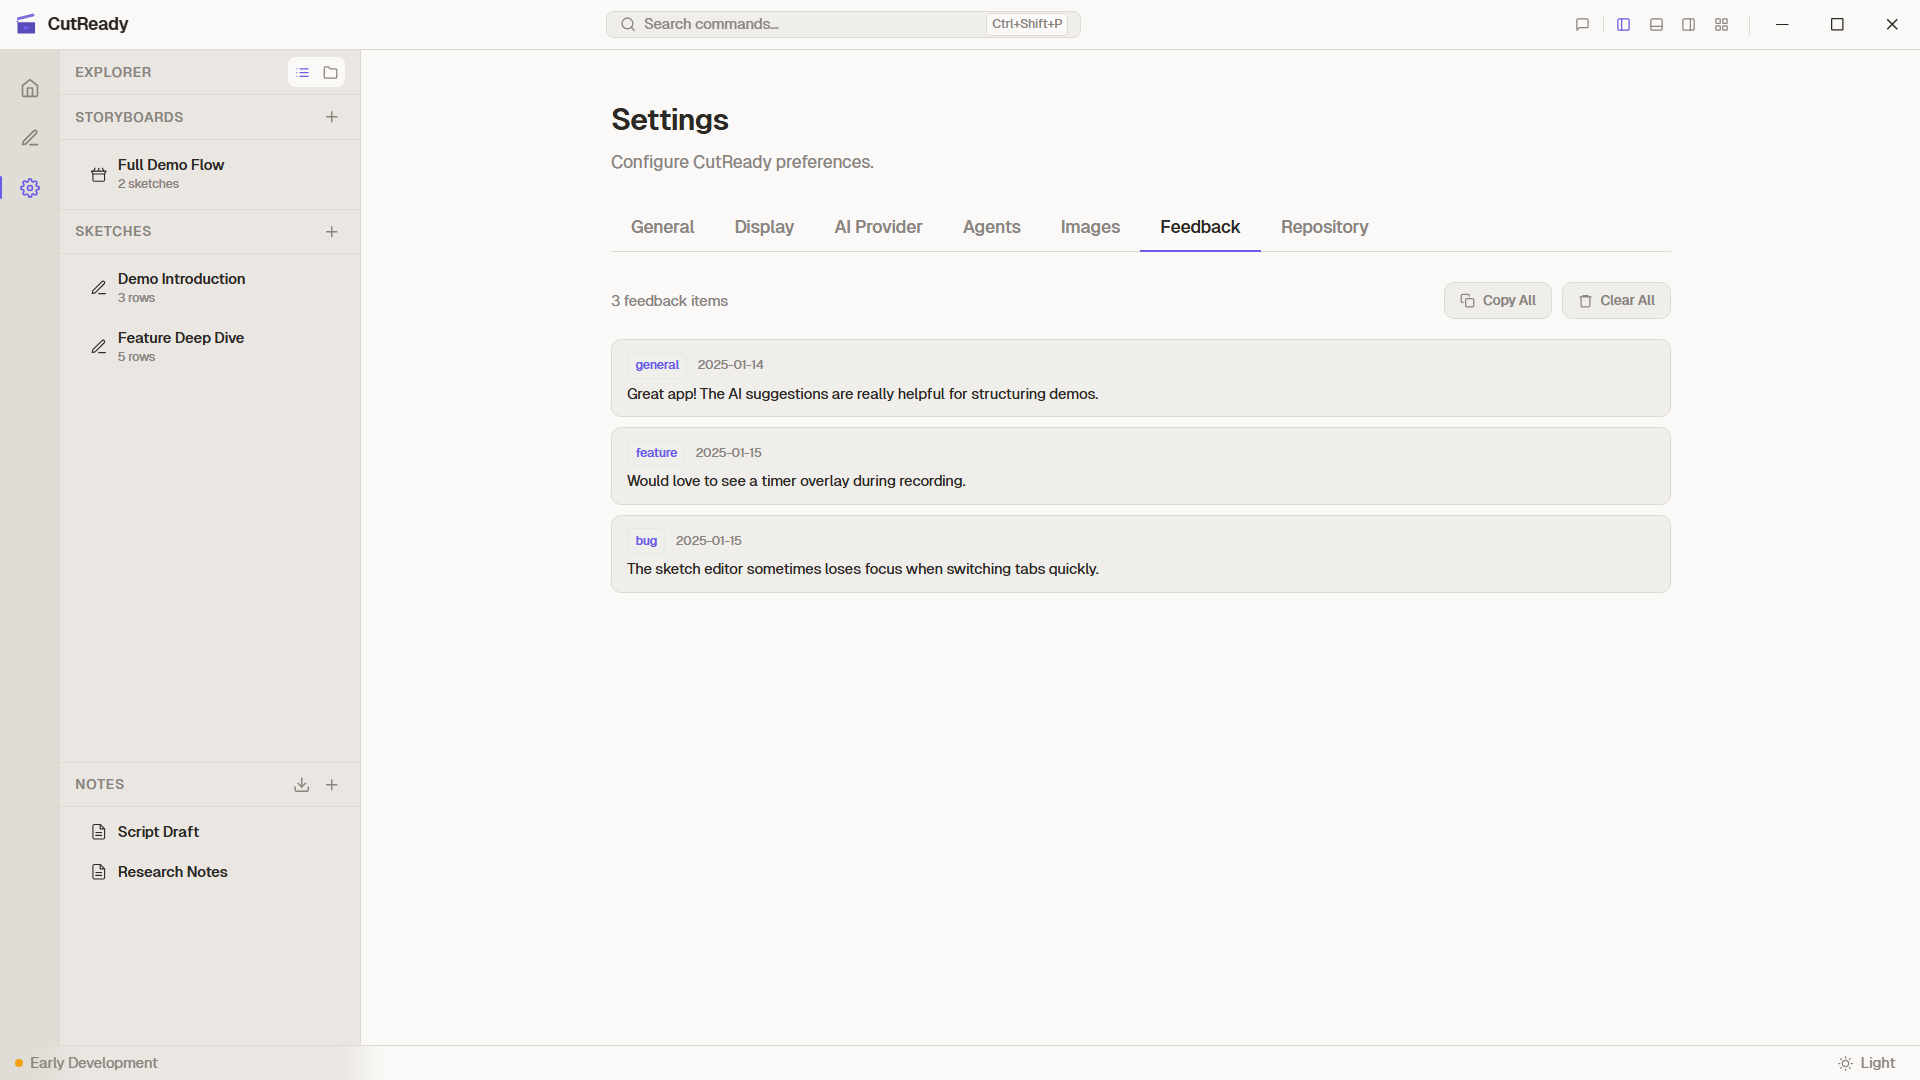

View all feedback you’ve submitted through the title bar popover or via the
AI assistant’s save_feedback tool. Entries are shown newest-first with:
- Category badge — General, Bug, Feature, or Design
- Date — When the feedback was submitted
- Debug log indicator — Shows if a debug log snapshot was attached
Actions
Section titled “Actions”Each feedback entry has hover buttons for:
- Copy — Copy the feedback text to clipboard
- Create GitHub Issue — Uses the AI to format your feedback into a well-structured GitHub issue, then opens your browser to the pre-filled issue creation page. Includes app version and optional debug log in a collapsible section.
You can also Copy All to get all feedback entries at once, or Clear All to reset your feedback history.
Image Manager
Section titled “Image Manager”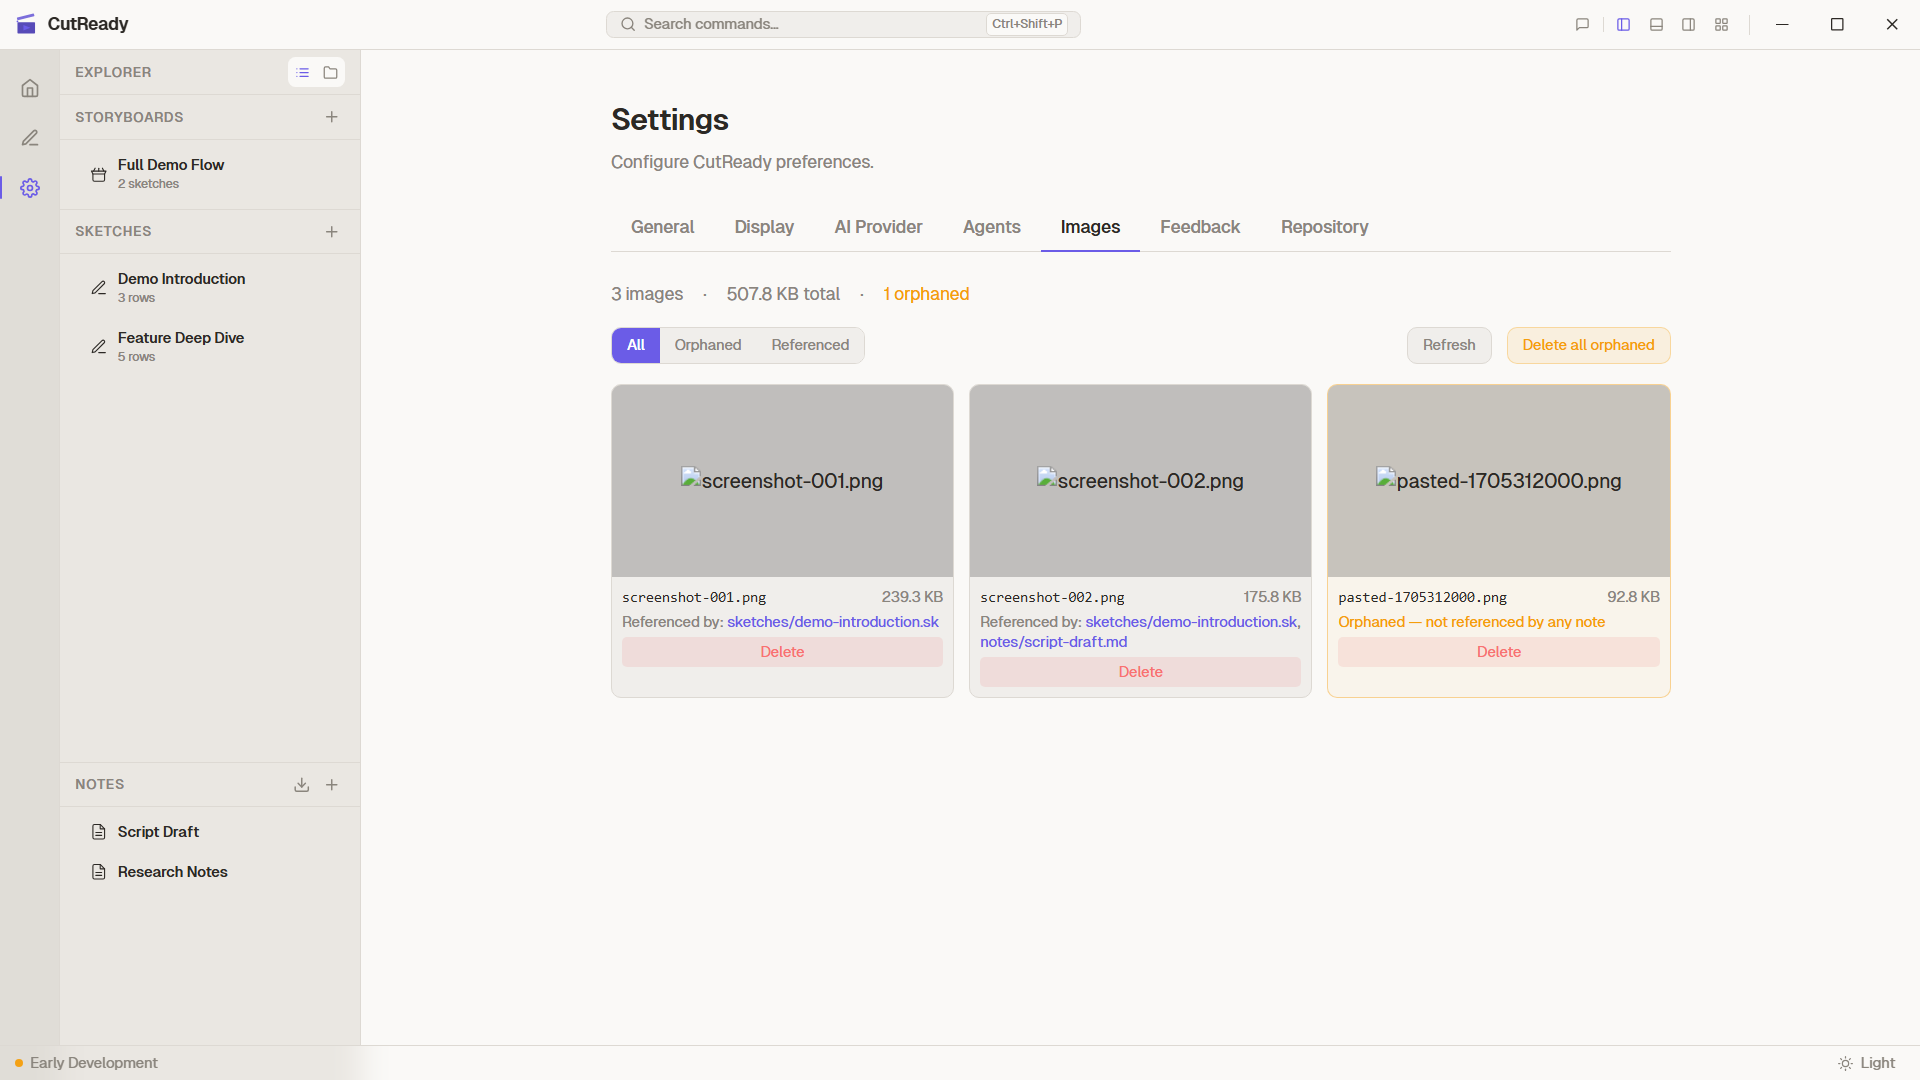
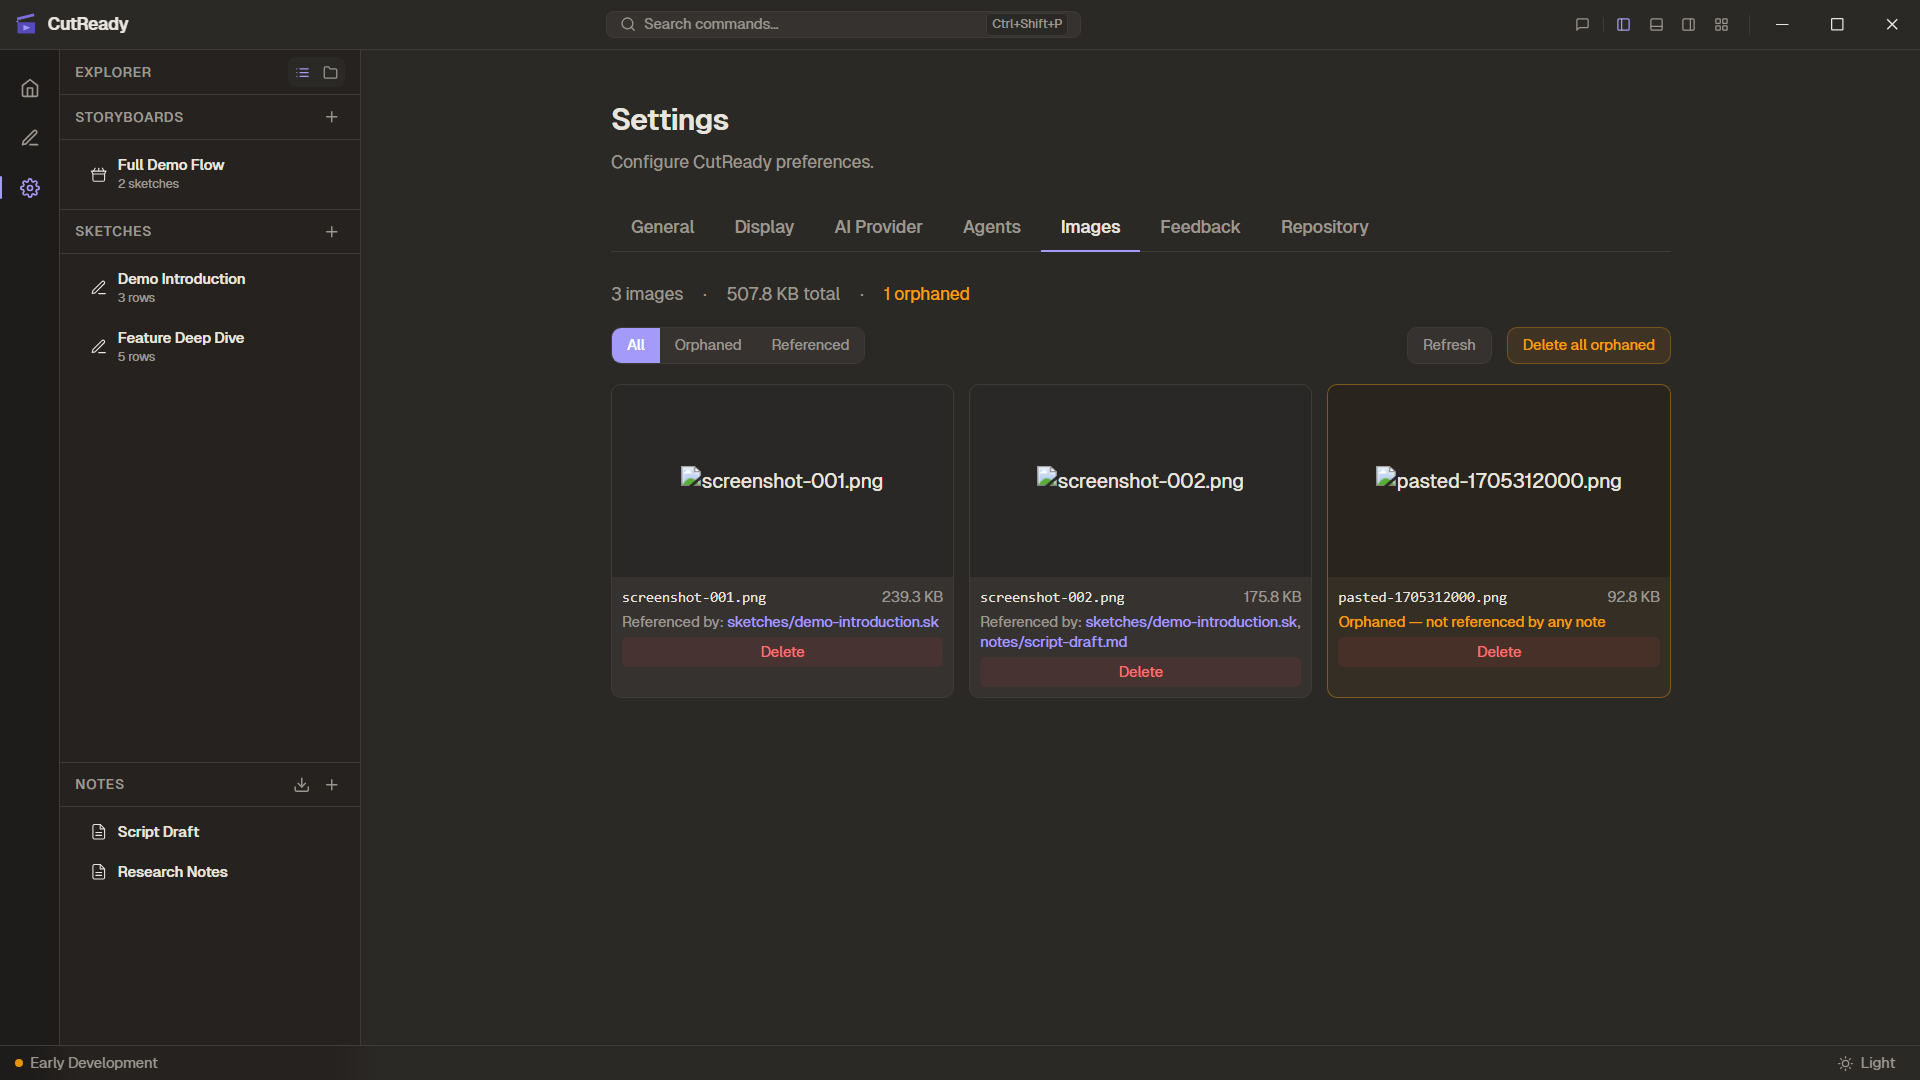
Browse and manage screenshots stored in your project’s .cutready/screenshots/
directory. The image manager shows:
- Thumbnail grid of all project images
- Which images are referenced by sketches and notes
- Orphan detection — identifies unused images that can be safely deleted
Settings Persistence
Section titled “Settings Persistence”All settings are persisted locally using Tauri’s app data directory. Settings are loaded on startup and apply immediately when changed — no restart required.